

Nov
Weave Hat
Make a Cobra Weave Hat Band: A Step-by-Step Guide
Learning how to Make A Cobra Weave Hat Band is a rewarding craft that allows you to personalize your hats with unique, handcrafted details. This guide will provide a comprehensive walkthrough, from choosing the right materials to mastering the cobra weave technique, enabling you to create a stylish and durable hat band.
Gathering Your Supplies for a Cobra Weave Hat Band
Before you begin to make a cobra weave hat band, assemble these essential materials:
- Leather Lacing: Choose high-quality leather lacing in your desired color and width. Thicker lacing will result in a bolder hat band, while thinner lacing offers a more delicate look. Consider the style of your hat when selecting the lacing width.
- Scissors: Sharp scissors are crucial for clean cuts and preventing fraying of the leather.
- Lighter or Edge Beveler (Optional): These tools can help seal the ends of your lacing to prevent fraying and create a more professional finish.
- Ruler or Measuring Tape: Accurate measurements are essential for creating a hat band that fits perfectly.
- Hat (Optional): Having the hat on hand can help you visualize the final product and ensure a proper fit.
Understanding the Cobra Weave Stitch
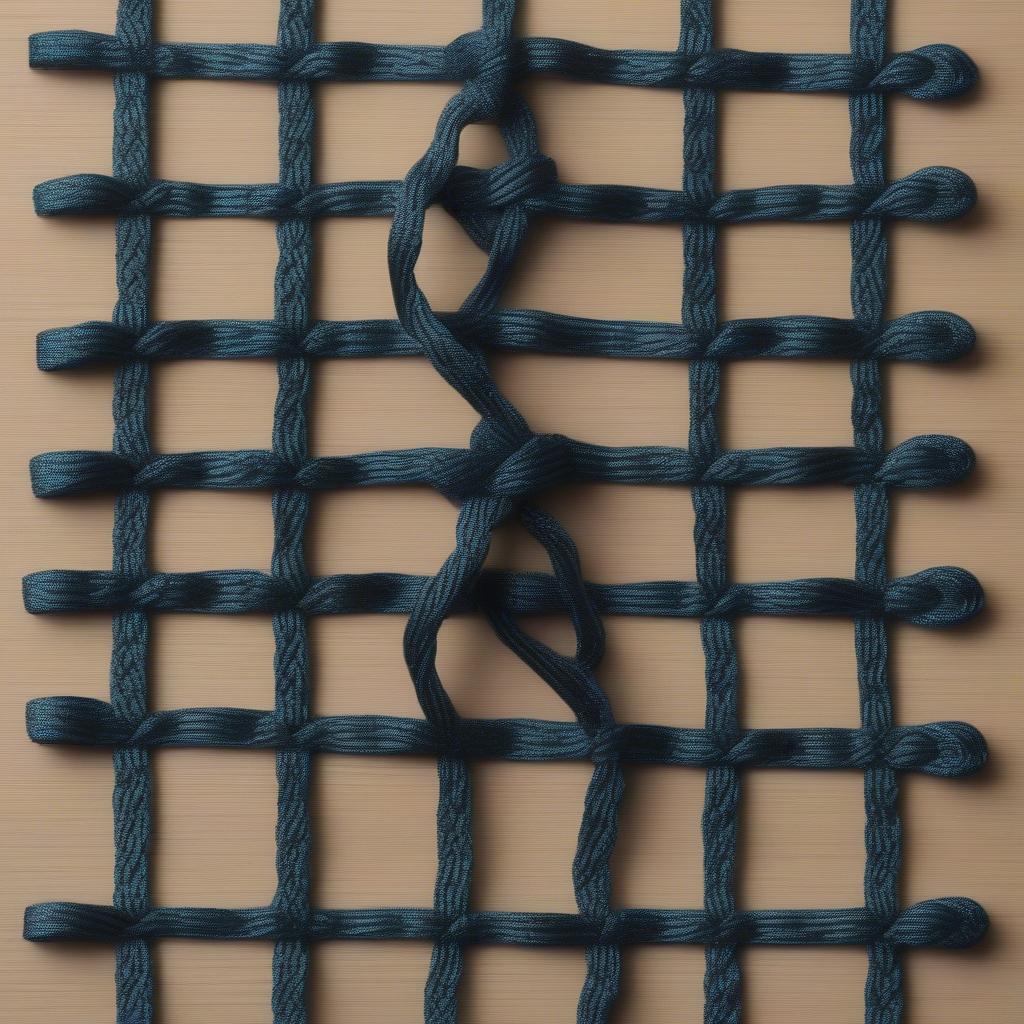
The cobra weave, also known as the Solomon bar or Portuguese sinnet, is a versatile and visually appealing knotting technique. Its tight, interwoven structure creates a durable and attractive hat band. Here’s a step-by-step breakdown of the cobra weave stitch: Step-by-step illustration of the cobra weave knot
- Create a Loop: Start by folding your leather lacing in half, forming a loop.
- Working End and Standing End: Identify the working end (the two loose ends) and the standing end (the loop).
- The First Knot: Bring the working end over and under the standing end, creating a basic knot.
- Building the Weave: Continue bringing the working end over and then under the previous loop formed by the working end, tightening each knot as you go. This creates the distinctive braided look of the cobra weave.
Making Your Cobra Weave Hat Band
Now that you understand the cobra weave stitch, let’s apply it to create your hat band.
- Measure Your Hat: Measure the circumference of your hat where you want the hat band to sit. Add a few extra inches for the knot and any desired overlap.
- Cut the Lacing: Cut your leather lacing to the measured length. It’s always better to have a little extra lacing than not enough.
- Begin Weaving: Following the steps outlined above, start creating the cobra weave. Continue weaving until you reach the desired length for your hat band.
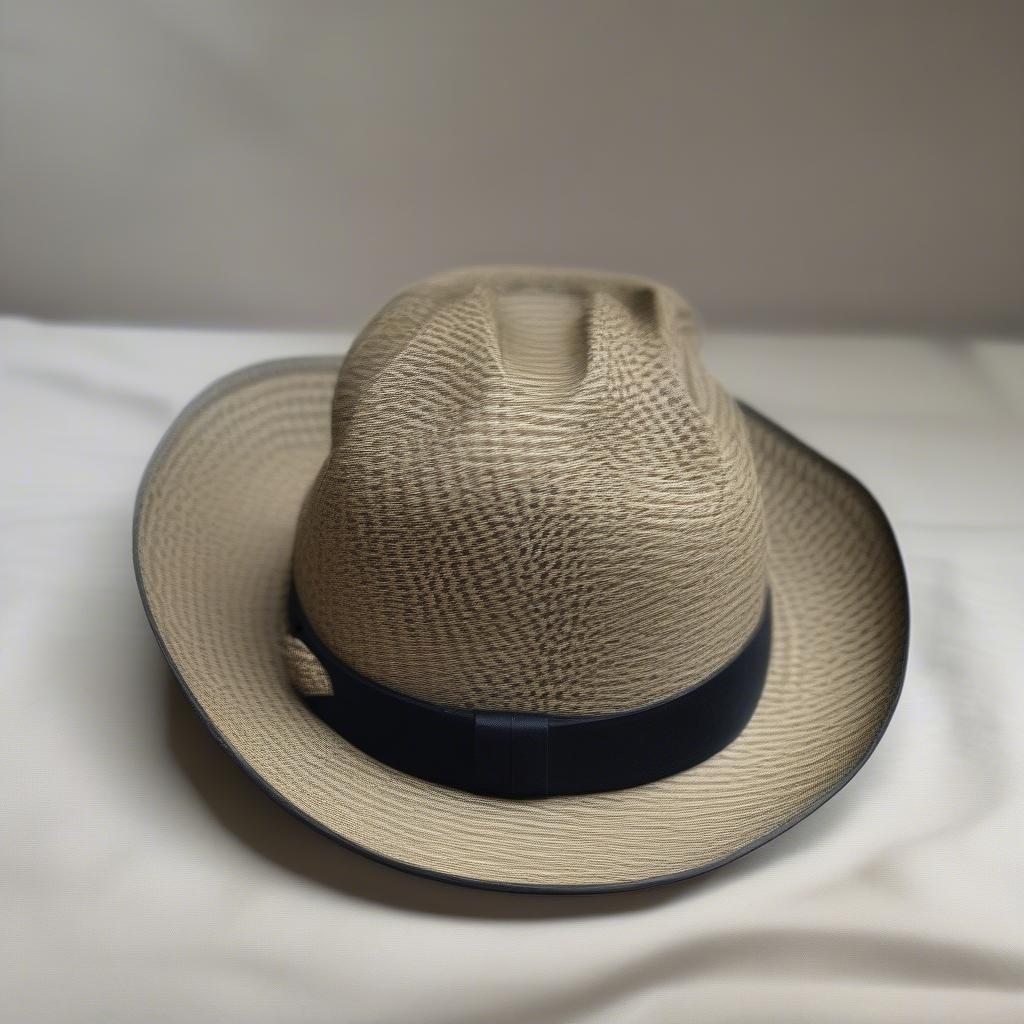 A finished cobra weave hat band on a hat
 - Finishing the Ends: Once you’ve reached the desired length, use a lighter or edge beveler to seal the ends of the lacing. This will prevent fraying and give your hat band a polished look.
- Attaching the Hat Band: You can attach the hat band to your hat by tying the ends together, using a decorative button or clasp, or even sewing it directly onto the hat.
Conclusion
Making a cobra weave hat band is a satisfying project that allows you to add a personalized touch to your headwear. With a little practice and patience, you can create a beautiful and durable hat band that will last for years to come. Remember to experiment with different colors and widths of leather lacing to create truly unique designs. So, grab your supplies and start crafting your own stylish cobra weave hat band!
FAQ
- What type of leather lacing is best for a hat band?
- How do I determine the correct length of lacing for my hat band?
- Can I use other materials besides leather for a cobra weave hat band?
- What if my cobra weave is too loose or too tight?
- How do I attach a decorative button or clasp to my hat band?
- What are some other uses for the cobra weave technique?
- Where can I find more inspiration for hat band designs?
For further assistance, please contact our Hotline: +84 388 951 999, or visit our offices in Hanoi, Vietnam or Tech Avenue, Suite 12, San Francisco, CA 94105, USA. We have a 24/7 customer service team.