

Dec
Weave Hat
How to Weave a Hat: A Comprehensive Guide
Learning How To Weave A Hat opens up a world of creative possibilities, allowing you to craft unique, personalized headwear. From choosing the right materials to mastering essential weaving techniques, this guide provides everything you need to know to start your hat-weaving journey.
Weaving a Raffia Hat: Step-by-Step Guide
Choosing Your Materials: From Raffia to Ribbon
The first step in how to weave a hat is selecting your materials. Natural fibers like raffia, straw, and palm leaves are popular choices for their durability and traditional appeal. For a more contemporary look, consider using ribbon, yarn, or even fabric strips. Your material choice will significantly influence the final look and feel of your hat. For beginners, raffia is an excellent option as it’s relatively easy to work with. how to weave a hat out of palm leaves offers a deeper dive into using natural palm leaves for a more rustic aesthetic.
Mastering Basic Weaving Techniques
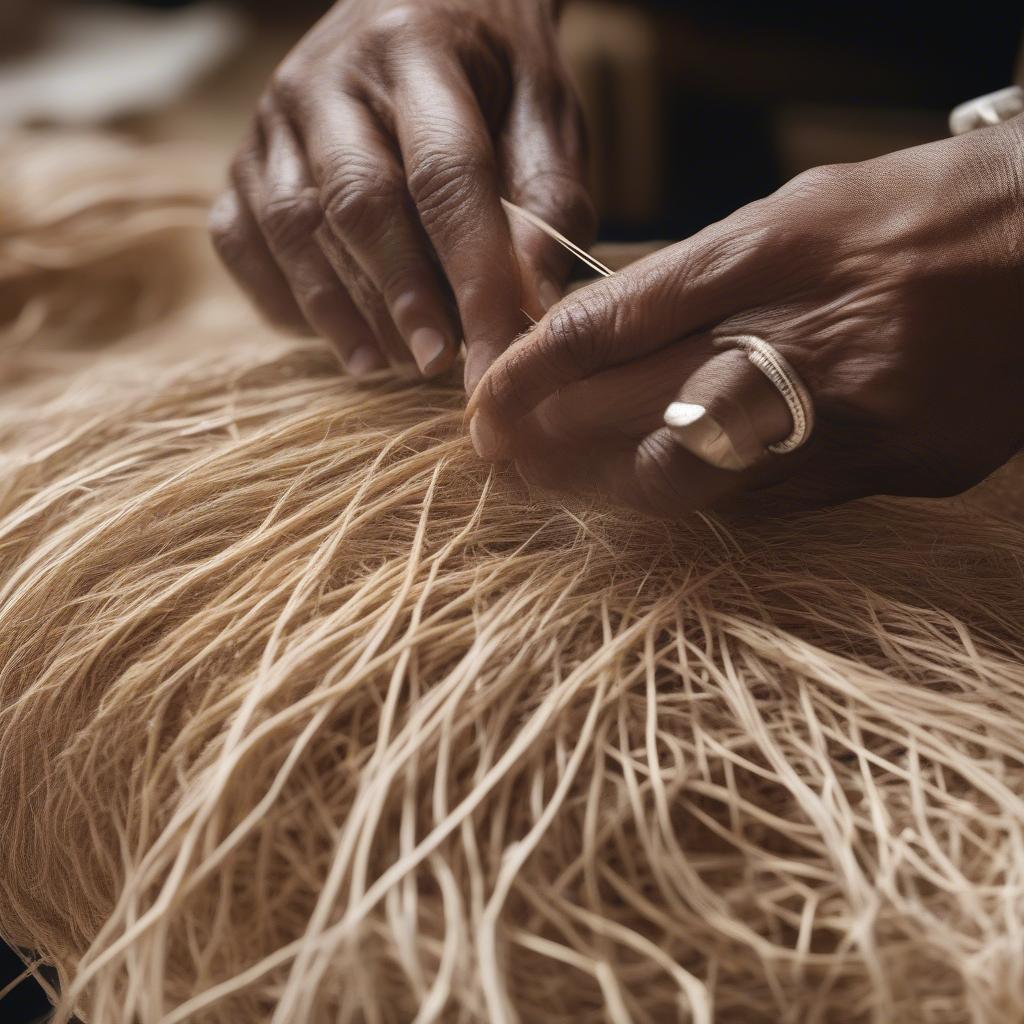
Once you’ve chosen your material, it’s time to learn the foundational weaving techniques. The most common techniques for hat weaving include plaiting, twining, and coiling. Plaiting involves interlacing three or more strands to create a flat, braided effect. Twining involves twisting two strands around each other, while coiling involves wrapping a flexible material around a core. Each technique yields a unique texture and pattern, allowing for endless creative expression.
 Twining Technique for Hat Making
“Choosing the right weaving technique is crucial for achieving the desired hat shape and style,” says renowned basket weaver, Anya Sharma. “Experimenting with different techniques can lead to exciting discoveries and truly unique designs.”
Shaping Your Hat: From Crown to Brim
Shaping your hat is where your artistry truly shines. You can create a variety of crown shapes, from a simple dome to a more complex conical or pinched crown. The brim can be wide and floppy, narrow and structured, or anything in between. Using a hat block or mold can help maintain the desired shape as you weave. Learning how to weave a hat on a loom can also be a helpful technique for achieving a consistent and symmetrical shape.
Adding Finishing Touches: Embellishments and More
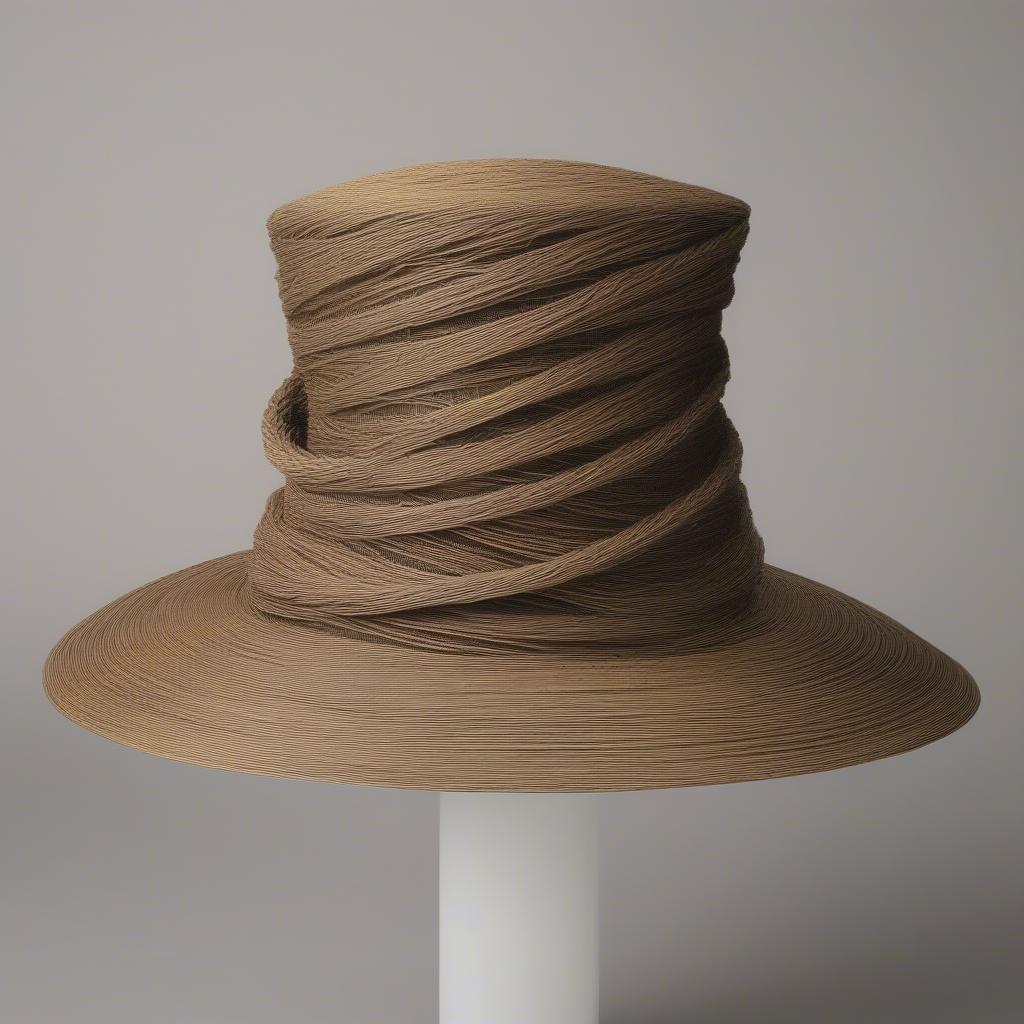
Once you’ve completed the basic structure of your hat, you can personalize it with embellishments. Adding decorative elements like beads, feathers, ribbons, or even dried flowers can elevate your creation from a simple hat to a wearable work of art. “Don’t be afraid to experiment with different embellishments to reflect your personal style,” advises Anya. “A few carefully chosen details can transform a plain hat into a statement piece.” You might also find inspiration in how to weave a hat out of paper which explores different textures and embellishments possible with paper.
 Finished Woven Hat with Embellishments
Conclusion: Your Hat-Weaving Adventure Awaits
Learning how to weave a hat is a rewarding experience that combines creativity, skill, and patience. From choosing the right materials to mastering the techniques and adding personalized touches, each step contributes to the creation of a unique and stylish accessory. So, gather your materials and embark on this exciting crafting adventure! You could even explore how to weave a hat out of palm fronds for a more tropical feel or how to weave a hat cardboard loom for a simpler approach.
FAQ
- What is the easiest material to use for weaving a hat?
- What are the basic weaving techniques for hat making?
- How can I shape the crown of my woven hat?
- What kind of embellishments can I add to my hat?
- Where can I find resources and tutorials on hat weaving?
- How long does it typically take to weave a hat?
- What tools do I need for hat weaving?
Need assistance with your hat-weaving project? Contact our 24/7 customer support team at +84 388 951 999 or visit our offices in Hanoi, Vietnam, or Tech Avenue, Suite 12, San Francisco, CA 94105, USA. We’re here to help!