

Dec
Weave Hat
How to Weave a Hat from Reeds
Weaving a hat from reeds is a rewarding craft that connects you with nature and tradition. Whether you’re looking for a stylish sun hat or a unique accessory, learning How To Weave A Hat From Reeds can be a fun and fulfilling experience. This comprehensive guide will walk you through the process, from selecting the right reeds to mastering essential weaving techniques.
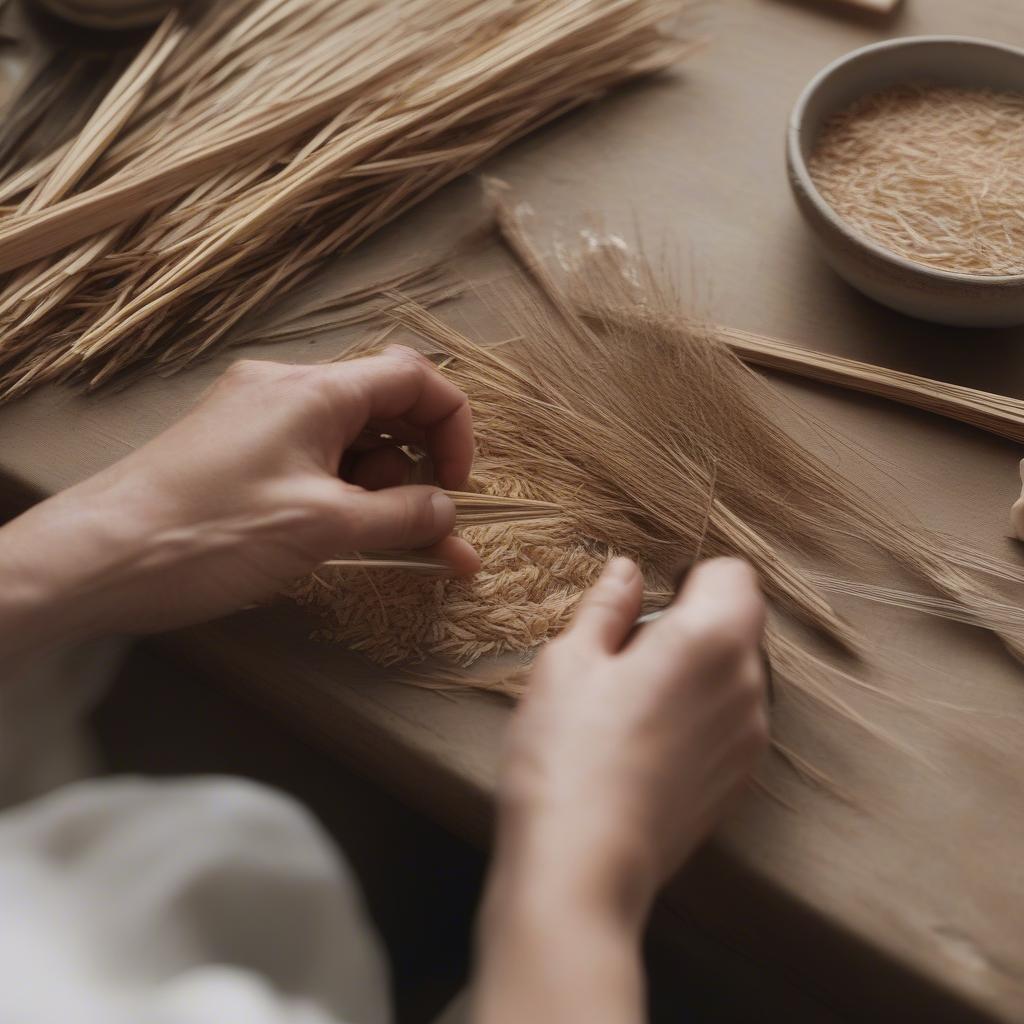
Preparing reeds for hat weaving
Gathering and Preparing Your Reeds
The first step in how to weave a hat from reeds is finding the right materials. Look for reeds that are long, straight, and flexible. Cattails, bulrushes, and common reeds are all good options. Harvest them in the late summer or early fall when they are dry and mature. After gathering, dry the reeds thoroughly in a well-ventilated area. This can take several weeks. Once dry, you can sort the reeds by size and length, discarding any that are damaged or unsuitable for weaving. Soaking the reeds in warm water for about 30 minutes before weaving will make them more pliable and easier to work with.
What types of reeds are best for hat weaving? Well, it depends on the hat style and the weaver’s preference. Some prefer the strength and durability of cattails, while others favor the finer texture of bulrushes. Experimenting with different reed types is part of the fun! You can even explore reed weaving hats for inspiration.
Basic Reed Weaving Techniques for Hats
Several weaving techniques can be employed when creating a reed hat. The most common methods include the plaiting technique, where reeds are interwoven in an over-under pattern, and the twining technique, which involves twisting two or more reeds together. For beginners, starting with a simple plaiting technique is often the easiest approach.
The Plaiting Technique: A Step-by-Step Guide
- Select an odd number of reeds, usually seven or nine for a beginner’s hat.
- Lay the reeds side by side, ensuring they are evenly spaced.
- Begin weaving by folding the outer left reed over the next two reeds, then under the following two reeds, and so on.
- Repeat this process with the outer right reed, folding it over two, under two, and continuing across.
- Continue alternating between the left and right reeds, creating a tight and even weave.
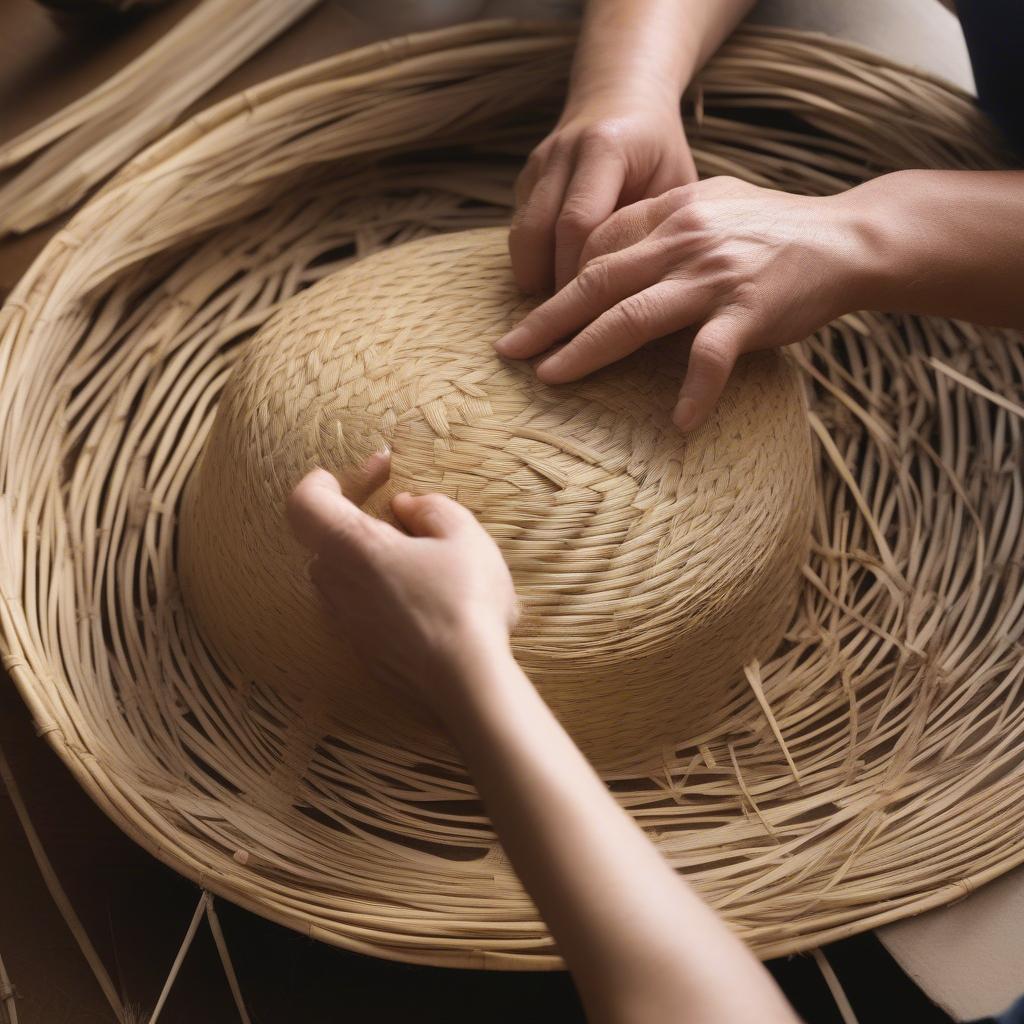 Plaiting reeds to form the hat structure
Want a different look? Consider the coil weave reeds hat method. It offers a unique and beautiful alternative to traditional plaiting.
Shaping Your Reed Hat
As your weaving progresses, you’ll need to start shaping the hat. This involves gradually curving the reeds upwards to form the crown. You can use a mold or simply shape the hat by hand as you weave. This stage requires patience and attention to detail to achieve the desired shape.
Creating the Crown and Brim
Forming the crown is where your artistic vision comes into play. Do you want a high, pointed crown, or a more rounded, shallow one? Once the crown is complete, continue weaving to create the brim. The brim can be wide or narrow, depending on your preference.
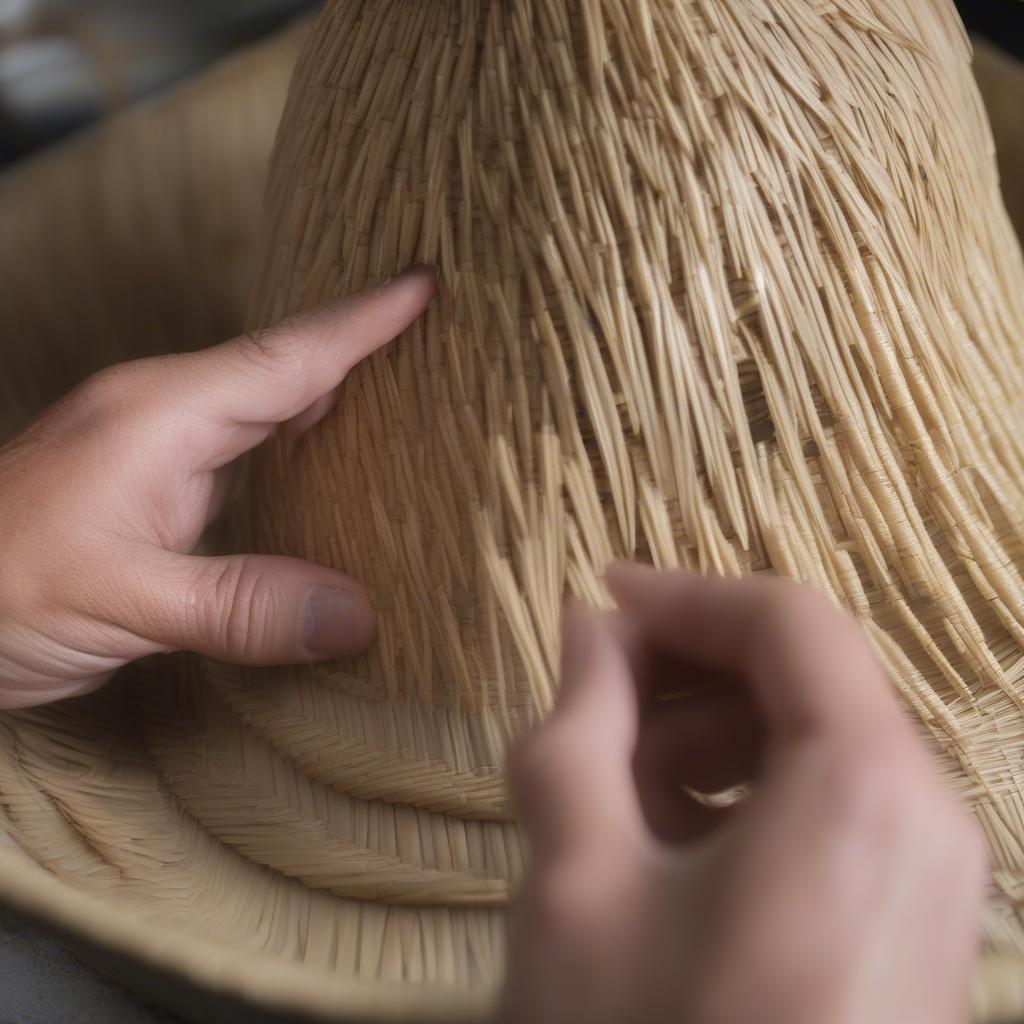 Shaping the crown of a reed hat
If you’re looking for a particular style, research what weave looks like coon skin hat or consider exploring different weaved hat designs.
Finishing Touches for Your Reed Hat
Once the hat is woven and shaped, you can add finishing touches. Trimming any excess reeds and securing the ends of the weave will give your hat a polished look. You can also add decorative elements like beads, feathers, or ribbons.
“A well-crafted reed hat is a testament to the weaver’s skill and creativity,” says renowned basket weaver, Anya Petrova. “The natural beauty of the reeds combined with the intricate weaving patterns creates a truly unique piece of wearable art.”
“The key to successful reed weaving is patience and attention to detail,” adds Petrova. “Don’t be afraid to experiment with different techniques and materials to discover your own unique style.”
If you’re interested in working with other natural materials, you might find cedar bark hat weaving to be a fascinating alternative.
In conclusion, learning how to weave a hat from reeds is a rewarding experience that allows you to create a functional and beautiful piece of art. With patience and practice, you can master the techniques and create your own unique reed hat.
FAQ
- What are the best reeds for hat weaving?
- How long does it take to weave a reed hat?
- What are the different weaving techniques for reed hats?
- How do I shape the crown of a reed hat?
- Can I add decorations to my reed hat?
- Where can I find more resources on reed weaving?
- What tools do I need for reed weaving?
Need support? Contact our 24/7 customer service at Hotline: +84 388 951 999, Hanoi, Vietnam or Tech Avenue, Suite 12, San Francisco, CA 94105, USA.