

Dec
Basket Weaving
How to Weave a Float Rope Basket
Learning How To Weave A Float Rope Basket opens up a world of crafting possibilities. This traditional technique produces stunning, durable baskets perfect for storage, decoration, or even gifting. Whether you’re a seasoned crafter or a complete beginner, this guide will equip you with the knowledge and steps to create your own beautiful float rope basket.
Getting Started with Float Rope Basket Weaving
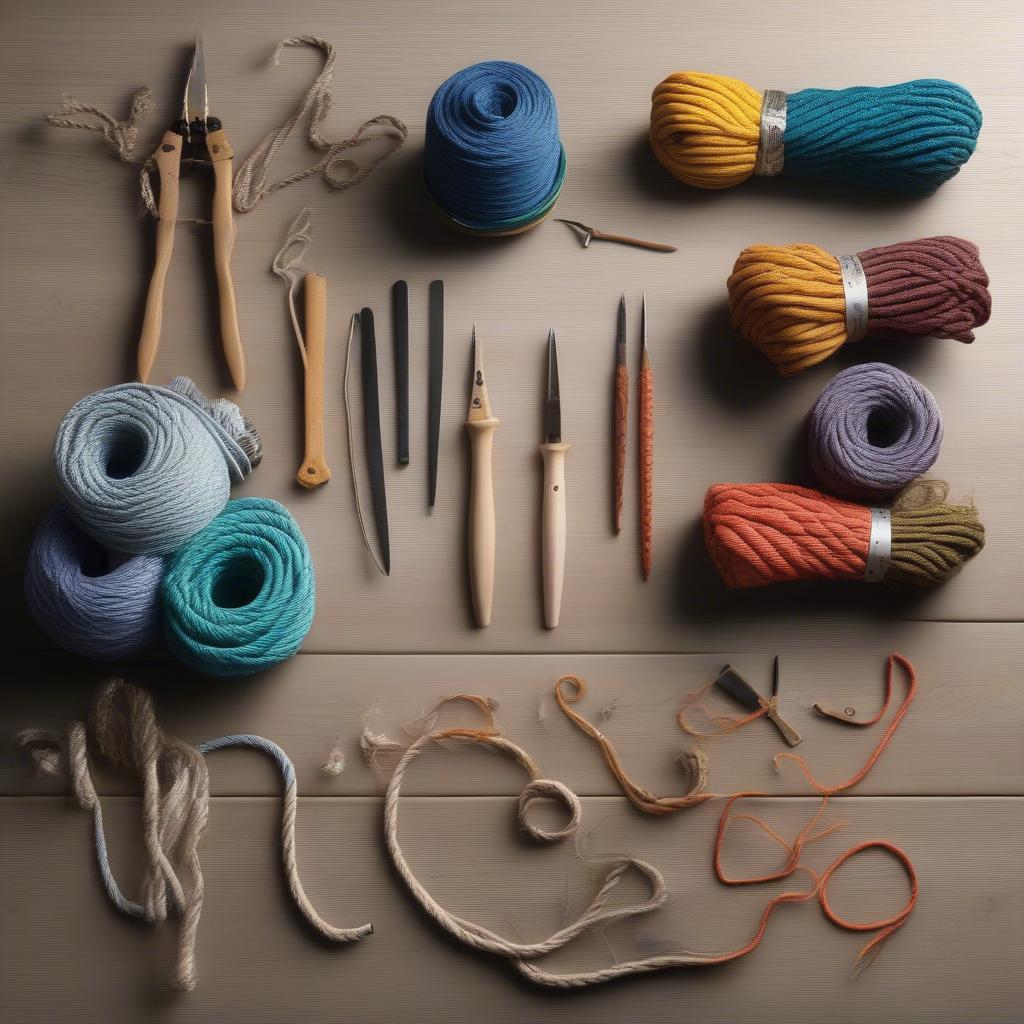
Float rope basket weaving utilizes a continuous weaving technique where the “float” rope (the weaving material) wraps around structural “stakes” (often made of thicker rope or reed). This creates a distinctive textured surface and allows for a variety of designs and shapes. Before you begin, gather your materials: float rope (cotton, jute, or synthetic), stakes, scissors, and a measuring tape. You might also find a fid helpful for maneuvering the rope. Remember, choosing high-quality materials is crucial for a beautiful and long-lasting basket. Float Rope Basket Weaving Materials: Rope, Stakes, Scissors, Measuring Tape
Preparing Your Stakes and Rope
The first step in how to weave a float rope basket is preparing your stakes. Cut your stakes to the desired height of your basket, adding a few extra inches for the base. An odd number of stakes is typically used for this technique. Next, prepare your float rope. Ensure you have ample length, as running out mid-weave can be disruptive. A good rule of thumb is to estimate three times the circumference of your desired basket size. So, if you are aiming for a 10-inch diameter basket, have at least 90 inches of float rope. Now, let’s start weaving!
Creating the Basket Base
Begin by arranging your stakes in a starburst pattern, ensuring they are evenly spaced. Tie the end of your float rope around the center of the stakes, securing it tightly. This knot forms the foundation of your basket base. Begin weaving the float rope around the stakes, moving over one stake and under the next. This is the basic over-under weave. Maintain even tension as you weave to ensure a uniform basket shape. 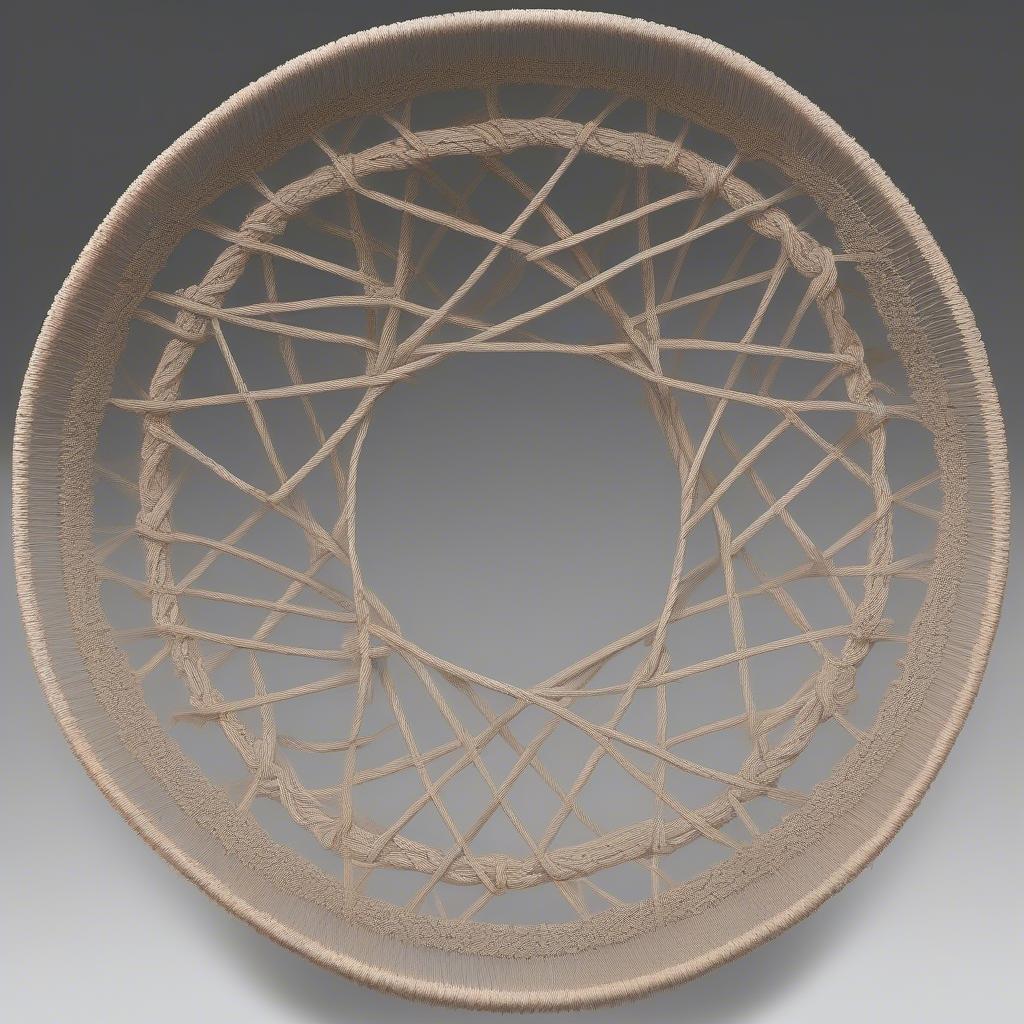 Creating the Base of a Float Rope Basket: Arranging Stakes, Tying Knot, Over-Under Weave
Building the Basket Walls
Once you’ve created a base of the desired size, it’s time to build the basket walls. To do this, gently bend the stakes upwards. Continue the over-under weaving technique, now wrapping the float rope around the upright stakes. As you weave, the stakes will naturally curve inwards, forming the basket shape. Maintain consistent tension on the float rope to ensure a tight and even weave. You can adjust the angle of the stakes to control the shape of your basket. A steeper angle creates a taller, narrower basket, while a shallower angle results in a wider, shorter basket. Remember to keep the stakes evenly spaced for a balanced look.
Adding Design Elements
One of the joys of float rope basket weaving is the ability to incorporate decorative elements. You can change the color of your float rope, create patterns by varying the weaving technique, or even add beads or other embellishments. Feel free to experiment and personalize your basket. For example, you could try a twining weave, where two strands of rope are twisted around the stakes, creating a more textured surface. 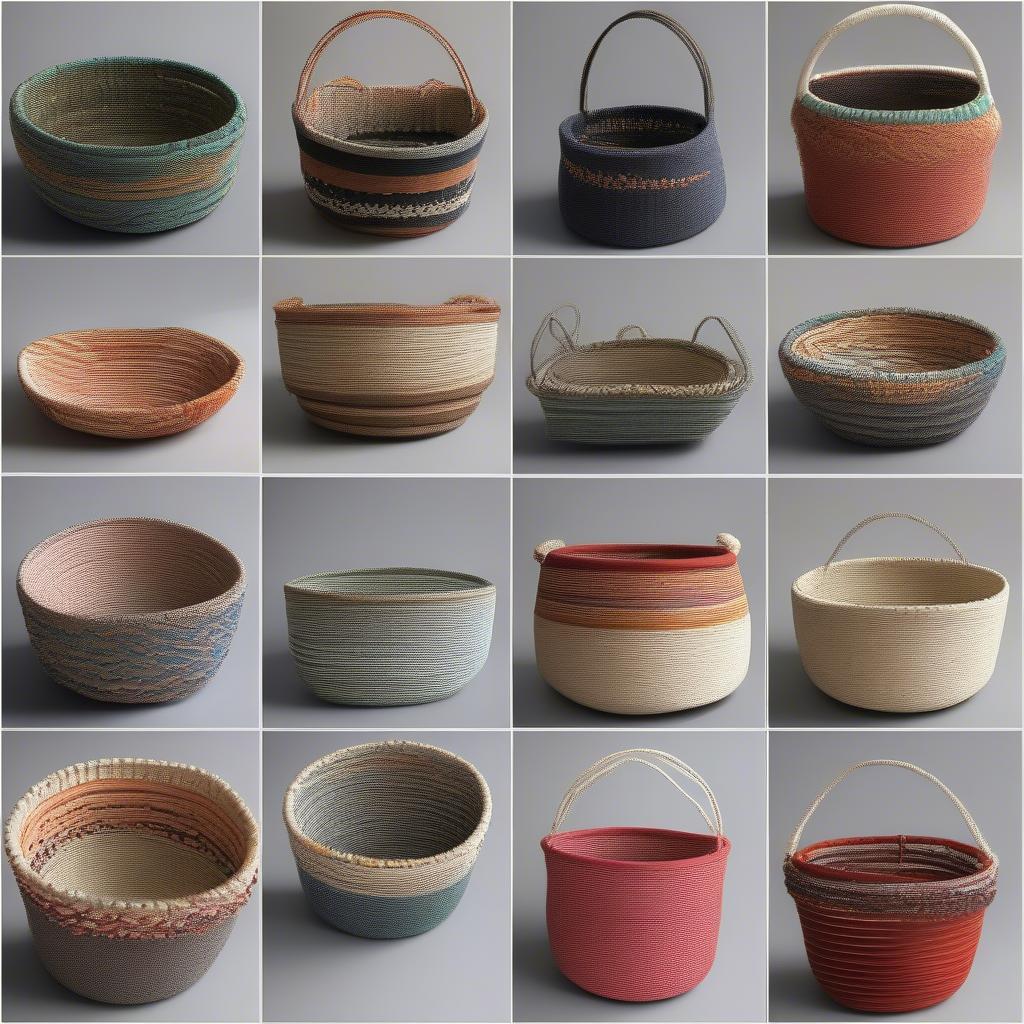 Adding Design Elements to a Float Rope Basket: Changing Rope Color, Varying Weaving Techniques, Adding Beads Think of your basket as a blank canvas and let your creativity flow!
Finishing Your Float Rope Basket
Once you’ve reached your desired height, it’s time to finish off your basket. Tuck the end of the float rope under several rows of weaving to secure it. Trim any excess rope. You can then add a decorative rim or handle if you wish. Remember to weave securely, ensuring your basket is sturdy and will hold its shape.
“A well-crafted basket is not just a functional item, but a piece of art that tells a story,” says renowned basket weaver, Amelia Reed. “The beauty lies in the simplicity of the technique and the connection to natural materials.”
Another expert, John Willow, adds, “The process of float rope basket weaving is meditative and rewarding. The rhythmic motion of weaving can be incredibly calming.” He encourages beginners to embrace the imperfections and enjoy the journey of creating something beautiful with their own hands.
Conclusion
Learning how to weave a float rope basket is a rewarding experience. With practice and patience, you can create beautiful and functional baskets for your home or to give as gifts. Remember to start with quality materials and practice the basic over-under weave. Don’t be afraid to experiment with different colors, textures, and designs to create a unique piece that reflects your personal style. So, gather your materials and begin your float rope basket weaving journey today! How to lay basket weave tile might also be a fascinating craft to explore, combining artistry with practicality.
FAQ
- What type of rope is best for float rope basket weaving?
- How do I determine the size of my basket?
- Can I use different colored ropes in one basket?
- What can I do if I run out of rope mid-weave?
- How do I clean my float rope basket?
- Where can I find more float rope basket weaving patterns?
- What are some other uses for float rope baskets?
If you need assistance, please contact us at Hanoi, Vietnam or Tech Avenue, Suite 12, San Francisco, CA 94105, USA. We have a 24/7 customer support team. You might also find our articles on Konosuba basket weaver and how to install basket weave tile backsplash interesting.