

Dec
Basket Weaving
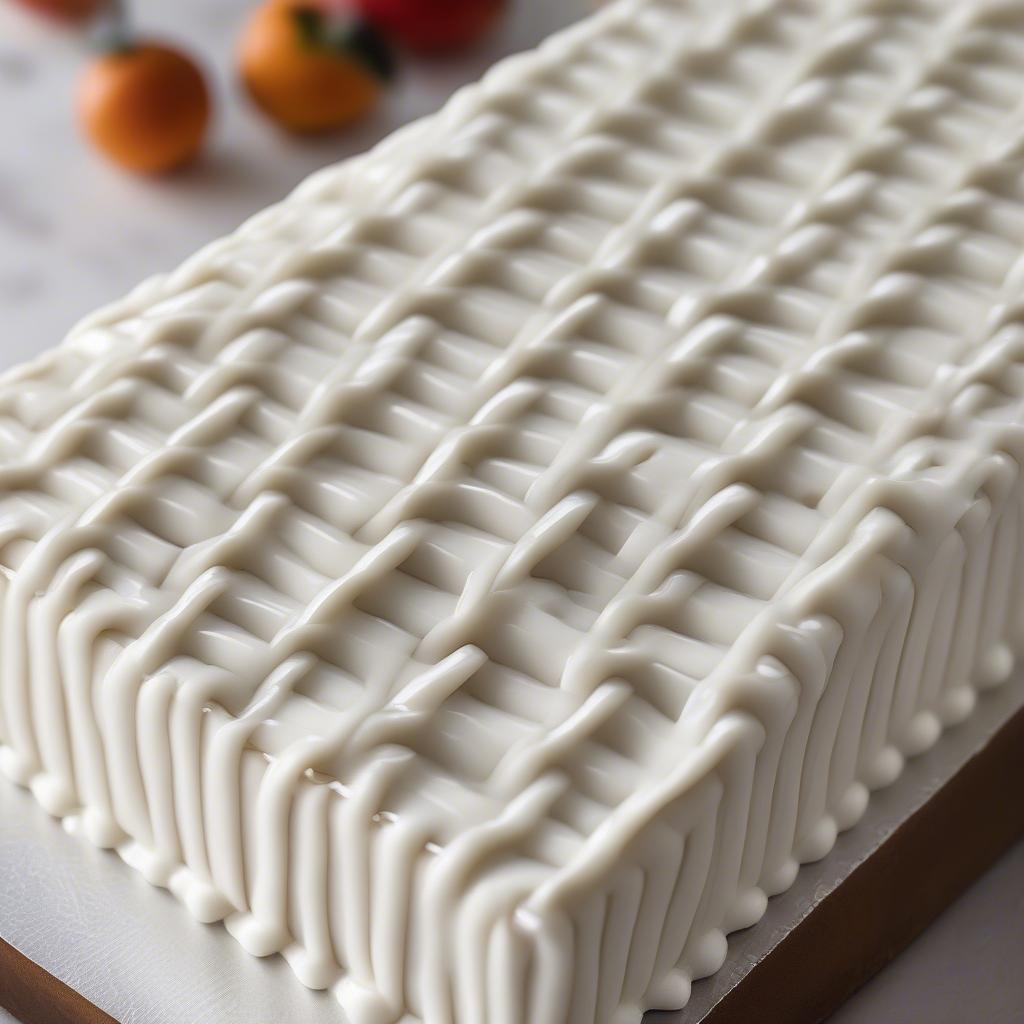
Mastering Icing Techniques: The Art of Basket Weave
Icing Techniques Basket Weave designs add a touch of elegance and sophistication to cakes and other baked goods. This intricate pattern, resembling woven strands of a basket, transforms ordinary treats into culinary masterpieces. Whether you’re a seasoned baker or just starting out, learning this technique can elevate your baking game. This guide explores the intricacies of icing techniques basket weave, providing tips, tricks, and step-by-step instructions to help you achieve stunning results.
Understanding the Basics of Icing Techniques Basket Weave
The basket weave pattern is created by piping vertical and horizontal lines of icing, carefully layered to mimic the interwoven strands of a basket. The key is precision and patience. Practice makes perfect, so don’t be discouraged if your first attempts aren’t flawless. Mastering this technique will impress your friends and family, and bring a professional touch to your creations.
Basic Basket Weave Icing Pattern
Tools and Materials for Icing Basket Weave
Having the right tools is essential for achieving a clean and professional basket weave pattern. You’ll need a piping bag fitted with a basket weave tip, typically a flat rectangular tip. Parchment paper or a practice board are helpful for practicing your technique before applying it to your cake. High-quality icing that holds its shape well is crucial. Consider using royal icing, buttercream, or a stabilized whipped cream.
- Piping bag: Choose a sturdy bag that can handle thicker icing.
- Basket weave tip: A flat rectangular tip is the standard choice for this technique.
- Icing: Opt for an icing that holds its shape well, like royal icing or buttercream.
- Parchment paper or practice board: Practice your technique before decorating your cake.
- Offset spatula (optional): Helpful for creating a smooth base coat of icing.
 Essential Tools for Icing Basket Weave
Step-by-Step Guide to Creating a Basket Weave Pattern
- Prepare your icing: Ensure your icing is the right consistency – not too runny, not too stiff.
- Pipe vertical lines: Pipe even, parallel vertical lines onto your iced cake or practice board.
- Pipe horizontal lines: Pipe horizontal lines over the vertical lines, creating the woven effect. Lift the tip slightly after each horizontal line to prevent dragging.
Are you interested in learning more about 3D basket weave cutting boards? Check out our 3d basket weave cutting board article for detailed instructions.
- Repeat the process: Continue alternating vertical and horizontal lines until the entire surface is covered with the basket weave pattern.
- Practice makes perfect: Don’t be discouraged if your first attempts aren’t perfect. Keep practicing to refine your technique.
Advanced Icing Techniques Basket Weave Variations
Once you’ve mastered the basic basket weave, you can experiment with different variations to create unique designs. Consider varying the width of your lines, or creating a diagonal basket weave by angling your piping. You can also incorporate different colors of icing for a more vibrant and eye-catching effect.
Creating a Diagonal Basket Weave
To achieve a diagonal basket weave, simply angle your piping lines instead of piping them vertically and horizontally. This adds a dynamic and visually interesting twist to the traditional basket weave pattern.
“The key to a perfect basket weave is consistent pressure and even spacing,” says renowned pastry chef, Amelia Dubois. “Practice on parchment paper first to get a feel for the technique before decorating your cake.”
 Advanced Basket Weave Icing Techniques
For those interested in exploring different basket weaving techniques, our guide on weaving grass baskets might be of interest. Learn the art of crafting beautiful and functional baskets using natural materials.
Troubleshooting Common Icing Basket Weave Problems
- Uneven lines: Ensure consistent pressure on the piping bag and maintain a steady hand.
- Lines breaking: Your icing might be too thin. Add more powdered sugar to thicken it.
- Pattern not holding its shape: Use a stiffer icing, such as royal icing, or chill your cake before decorating.
“Remember to chill your cake before icing,” advises Amelia Dubois. “This will create a stable surface for the icing and prevent it from sliding or melting.” You might also enjoy exploring the unique weaving methods involved in crafting a melon basket. Check out our how to weave a melon basket guide for more information.
Conclusion
Icing techniques basket weave is a beautiful and versatile technique that can elevate any cake or baked good. With practice and patience, you can master this skill and create stunning edible works of art. So grab your piping bag and start practicing!
Are you interested in pursuing basket weaving as a hobby or even a career? Check out our resource on uc irivne basket weaving for information on courses and workshops.
FAQ
- What type of icing is best for basket weave?
Royal icing or buttercream are recommended due to their stability. - What tip should I use for basket weave?
A flat rectangular tip is the standard choice. - Can I use a different type of tip?
While other tips can create similar effects, a rectangular tip provides the classic basket weave look. - My lines are uneven, what am I doing wrong?
Maintain consistent pressure on the piping bag and practice on parchment paper first. - How do I prevent the pattern from melting?
Chill your cake before decorating and use a stabilized icing. - Can I use multiple colors?
Absolutely! Using different colors can create stunning visual effects. - What other patterns can I try with a basket weave tip?
A basket weave tip can be used for various patterns, including ribbons, borders, and latticework.
If you’re a beginner looking for guidance, our waxed linen basket weaving instructions for beginners might be just what you need.
For further assistance, contact us at Hanoi, Vietnam or Tech Avenue, Suite 12, San Francisco, CA 94105, USA. We have a 24/7 customer support team.