

Dec
Basket Weaving
How to Weave a Bread Proofing Basket
Learning how to weave a bread proofing basket is a rewarding experience that connects you with a centuries-old tradition. It allows you to create a beautiful and functional tool that elevates your bread baking to a new level. This guide provides a step-by-step approach to crafting your own proofing basket.
Understanding the Basics of Bread Proofing Baskets
Before diving into the weaving process, let’s understand why these baskets are essential for artisan bread baking. Proofing baskets, also known as bannetons or brotforms, provide support for dough as it rises, allowing it to develop its final shape and texture. The coiled structure of a woven basket allows for airflow, preventing the dough from becoming too sticky. This also creates those beautiful spiral patterns on the crust we all adore. Want a specific pattern for your challah? Check out this basket weave challah.
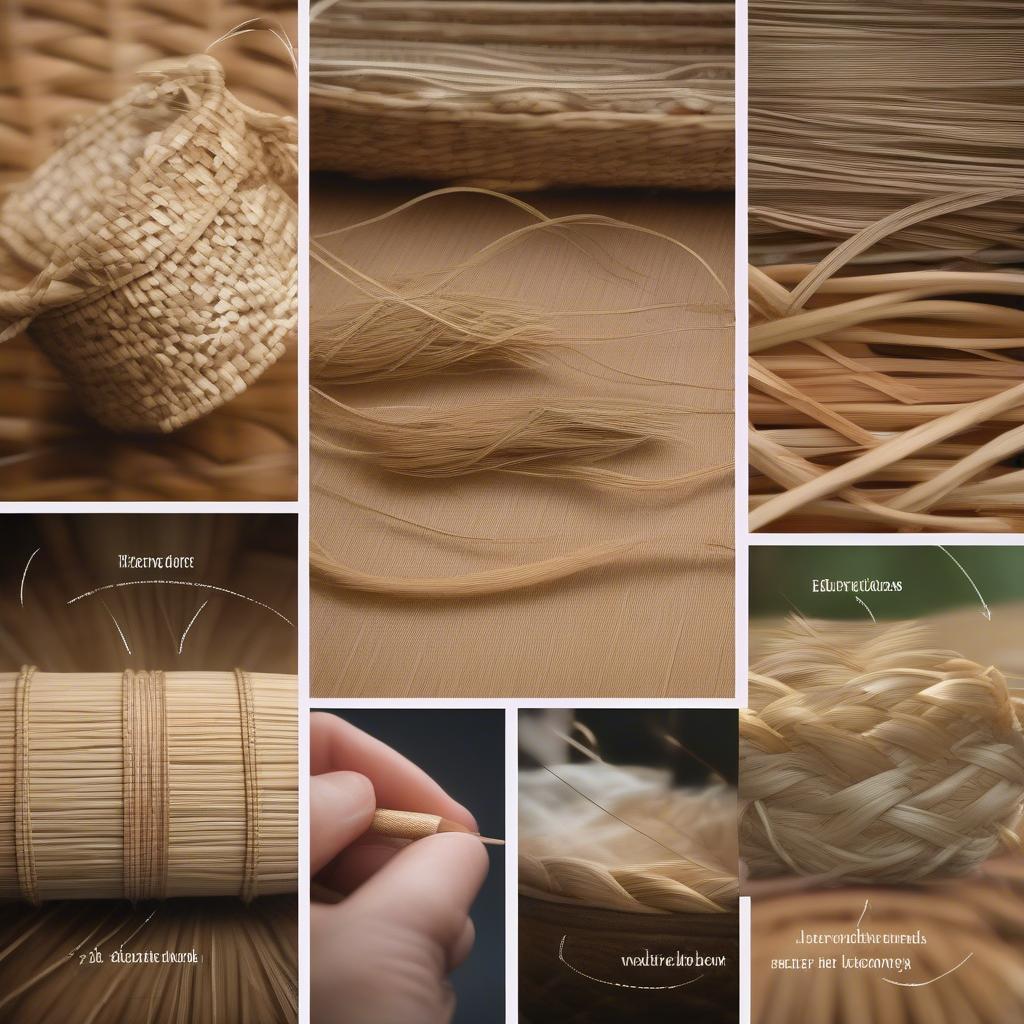
Choosing Your Materials: Rattan, Wicker, and More
The first step in how to weave a bread proofing basket is selecting the right materials. Rattan and wicker are popular choices for their durability and flexibility. Rattan is a natural palm stem, strong and resistant to moisture. Wicker, often confused with rattan, actually refers to the weaving process itself and can use various materials, including rattan. You’ll also need a sturdy needle and strong thread for binding the coils together.
Essential Weaving Materials for Proofing Baskets
Step-by-Step Guide: Weaving Your Basket
-
Preparing the Rattan/Wicker: Soak the rattan or wicker in warm water for about 30 minutes to make it pliable. This prevents breakage during the weaving process.
-
Creating the Base: Start by coiling a length of rattan or wicker into a tight spiral, securing it with thread at each rotation. This forms the base of your basket.
-
Building the Walls: Continue coiling the rattan/wicker, gradually increasing the diameter of the spiral to create the walls of the basket. Use the needle to bind each new coil to the previous one, ensuring a tight and secure weave. For a unique baking experience, consider a basket weave mat for baking.
-
Shaping the Basket: As you build the walls, gently shape the basket into the desired form. Traditional proofing baskets are round or oval, but you can experiment with different shapes.
-
Finishing the Rim: Once you reach the desired height, neatly tuck in the ends of the rattan/wicker and secure them with thread.
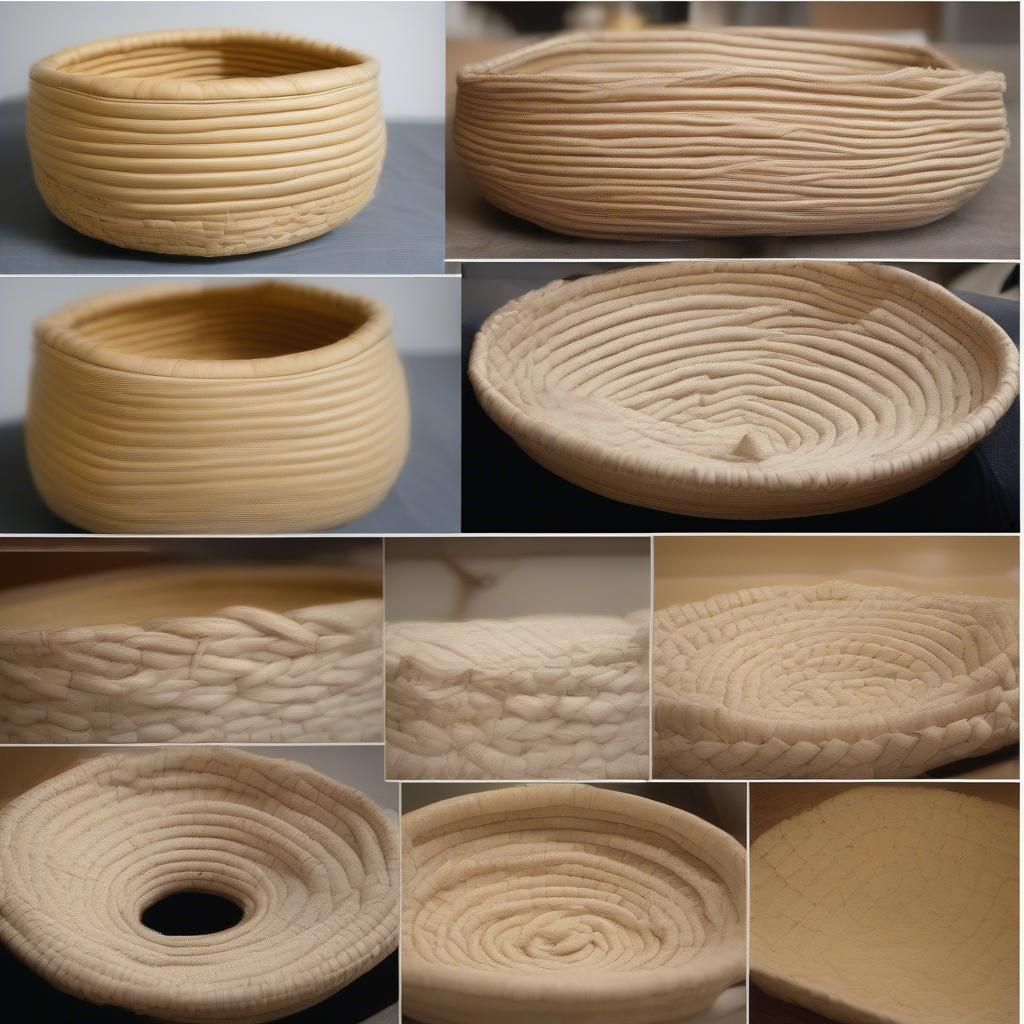 Step-by-Step Proofing Basket Weaving Process
Troubleshooting Common Weaving Issues
Sometimes, the rattan/wicker can become dry and brittle during weaving. If this happens, simply soak it in warm water again to restore its flexibility. If the coils are not binding tightly, double-check your threading technique and ensure you are pulling the thread taut after each stitch. You can also find a useful proofing basket weave pattern online.
Caring for Your Handwoven Bread Proofing Basket
Proper care ensures your basket lasts for years. After each use, brush out any excess flour and allow the basket to air dry completely. Avoid washing the basket with water, as this can cause it to warp or rot. Store your basket in a dry, well-ventilated area.
“A well-made proofing basket is an investment in your bread baking journey,” says renowned artisan baker, Amelia Hearth. “It’s a tool that not only shapes your bread but also adds a touch of artistry to the process.”
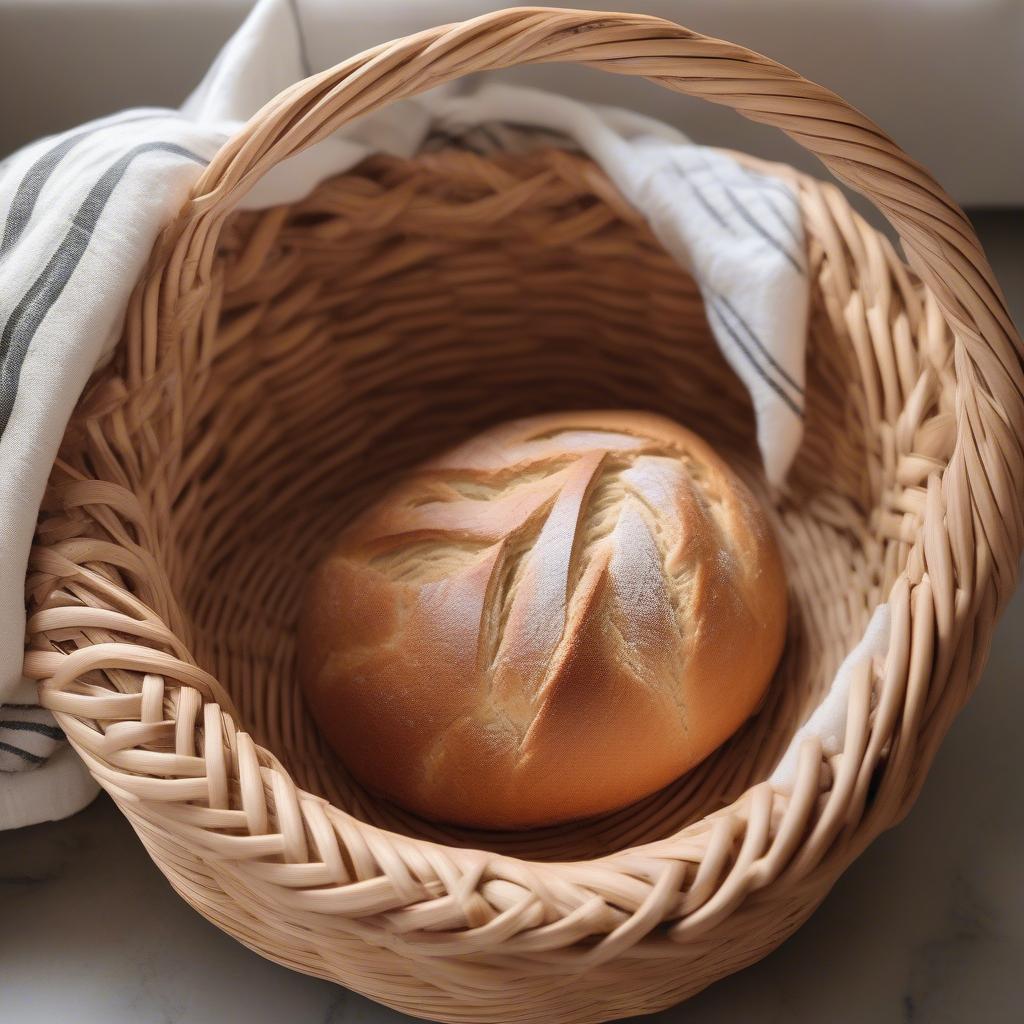 Beautifully Crafted Bread Proofing Basket
Conclusion
Learning how to weave a bread proofing basket is a rewarding craft that enhances the art of bread making. With patience and practice, you can create a beautiful and functional basket that will elevate your baking experience. For those interested in specific patterns, a basket weave patter can be a great resource. Another option is a wood pulp round proofing basket weave pattern, offering a different material and weaving experience.
FAQ
- What is the best material for a proofing basket?
- How do I clean my proofing basket?
- Can I use a proofing basket for other types of dough?
- What size proofing basket should I buy?
- How do I prevent my dough from sticking to the basket?
- Where can I find patterns for weaving a proofing basket?
- How long does it take to weave a proofing basket?
If you have more questions and need help or require a proofing basket, contact us in Hanoi, Vietnam or Tech Avenue, Suite 12, San Francisco, CA 94105, USA. We have a 24/7 customer support team.