


Dec
Basket Weaving
How to Make a Basket Weave Cutting Board
Creating a basket weave cutting board is a rewarding project that blends the beauty of traditional weaving with the practicality of a kitchen essential. This guide will walk you through the process of making your own stunning and functional basket weave cutting board, perfect for adding a touch of rustic charm to your kitchen or gifting to a fellow craft enthusiast.
Understanding the Basket Weave Pattern
The basket weave pattern, reminiscent of classic wicker baskets, is achieved by alternating strips of wood to create an interlocking design. This method not only adds visual appeal but also enhances the board’s durability by distributing stress across the surface. Example of a basket weave pattern
Materials You’ll Need
Before you begin, gather the following materials. Choosing high-quality wood is essential for a long-lasting cutting board. Hardwoods like maple, cherry, and walnut are recommended for their durability and resistance to knife marks.
- Hardwood strips (various species for contrast)
- Wood glue
- Clamps
- Sandpaper (various grits)
- Mineral oil or cutting board conditioner
- Safety glasses and dust mask
- Measuring tape and pencil
- Table saw or circular saw with a crosscut sled (for precise cuts)
Step-by-Step Guide to Creating a Basket Weave Cutting Board
-
Prepare the Wood Strips: Cut your chosen hardwood into strips of equal width and thickness. A thickness of approximately ½ inch is ideal for a sturdy cutting board. Aim for strips that are at least 1 inch longer than your desired board length.
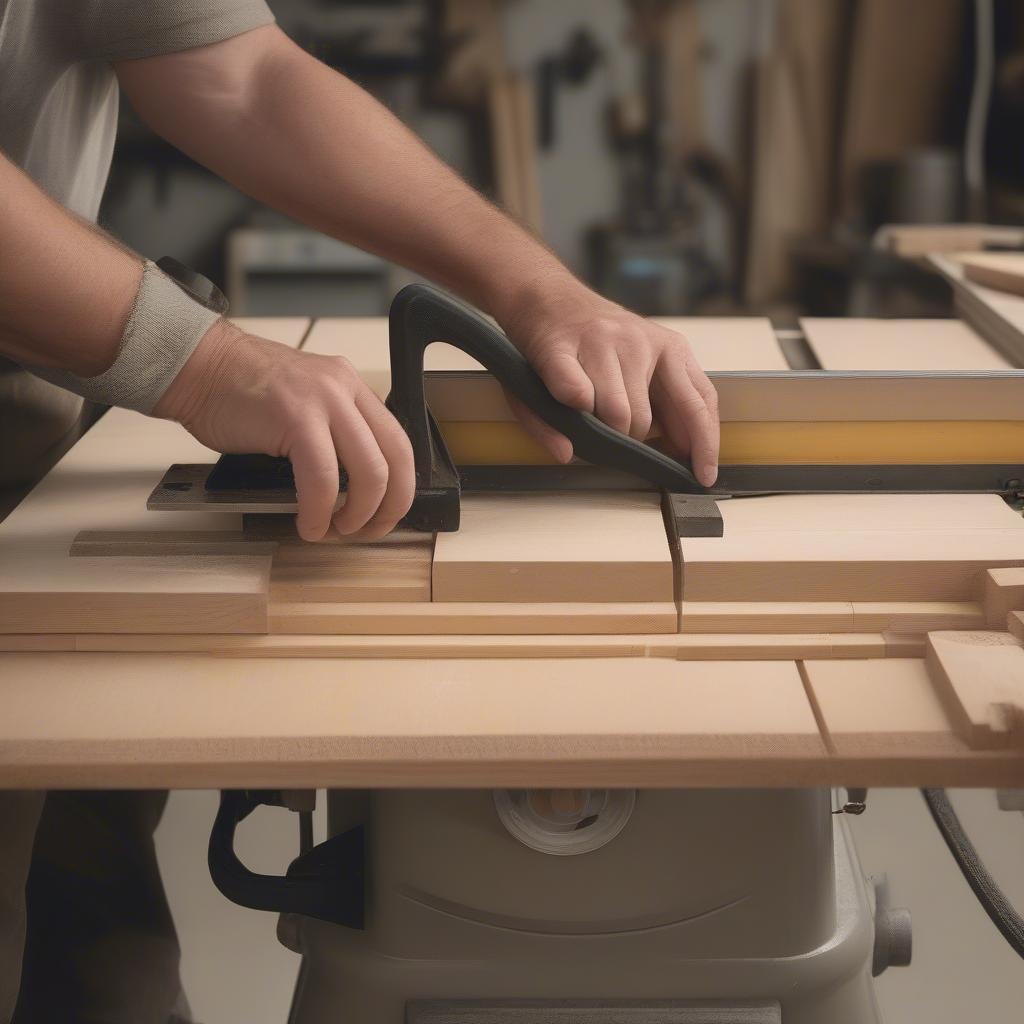 Cutting wood strips for a basket weave cutting board
 -
Arrange the Weave: On a flat surface, arrange the strips to form the basket weave pattern. Alternate the wood species for a visually appealing contrast. Ensure the strips are tightly fitted against each other.
-
Glue and Clamp: Apply wood glue to the edges of each strip where they contact adjacent strips. Use clamps to secure the assembly, ensuring even pressure across the entire board. Allow the glue to dry completely according to the manufacturer’s instructions.
-
Trim and Sand: Once the glue is dry, trim the edges of the board to create a clean, rectangular shape. Sand the surface thoroughly, starting with a coarser grit sandpaper and gradually moving to finer grits for a smooth finish.
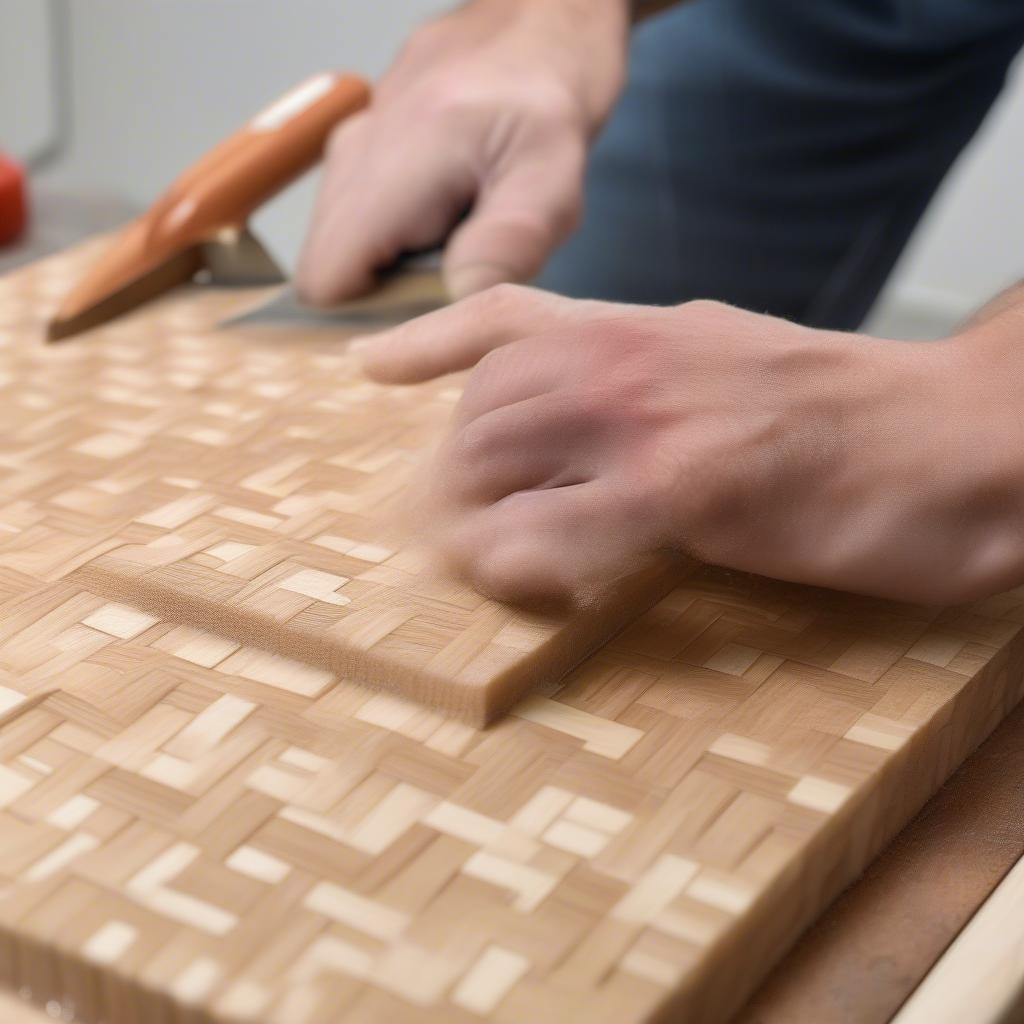 Sanding a basket weave cutting board
 -
Condition the Board: Apply a generous coat of mineral oil or cutting board conditioner to the entire surface. This will protect the wood and prevent it from drying out. Reapply the conditioner regularly to maintain the board’s beauty and functionality.
Tips for a Perfect Basket Weave
- Use contrasting wood species for a dramatic effect.
- Ensure the strips are of uniform thickness for a seamless weave.
- Use a crosscut sled for accurate and consistent cuts.
- Don’t rush the gluing and clamping process.
- Regularly condition your board to prolong its life.
“The key to a beautiful basket weave is precision. Take your time with each step, and the results will speak for themselves.” – John Carpenter, Master Woodworker
“Choosing the right wood is just as important as the weaving itself. Hardwoods like maple and walnut are ideal for cutting boards due to their durability and resistance to scratches.” – Sarah Miller, Woodworking Instructor
Conclusion
Creating a basket weave cutting board is a satisfying project that combines craftsmanship with functionality. By following these steps and tips, you can craft a beautiful and durable cutting board that will enhance your kitchen for years to come. How To Make A Basket Weave Cutting Board isn’t as difficult as it seems, and the result is well worth the effort.
FAQ
-
What type of wood is best for a cutting board?
Hardwoods like maple, cherry, and walnut are ideal. -
How thick should the wood strips be?
Approximately ½ inch is recommended. -
What type of glue should I use?
Wood glue designed for woodworking projects. -
How often should I condition my cutting board?
Monthly, or more often with frequent use. -
Can I use softwoods for this project?
Softwoods are not recommended as they are prone to damage. -
What is the best way to clean a wooden cutting board?
Hand wash with warm soapy water and dry immediately. -
How do I prevent warping?
Ensure even glue distribution and clamping pressure during assembly.
Common Scenarios and Questions
Scenario: Gaps between the woven strips.
Solution: Ensure the strips are tightly fitted before gluing and clamping.
Scenario: The board surface is uneven after sanding.
Solution: Use a sanding block for even pressure and progressively finer sandpaper.
Question: Can I use a different pattern?
Answer: Absolutely! Experiment with herringbone or other patterns.
Related Articles and Resources
- Caring for Your Wooden Cutting Board
- Choosing the Right Wood for Your Project
- Advanced Woodworking Techniques
Need assistance? Contact our 24/7 customer service at Hotline: +84 388 951 999, or visit us at Hanoi, Vietnam or Tech Avenue, Suite 12, San Francisco, CA 94105, USA.